
The LXC containers in Proxmox are ideal for hosting applications such as Nextcloud, Plex or Paperless-NGX. These services have one thing in common: they access data that is usually stored on a NAS. You do not want to store the data in the LXC itself. This is why NAS shares can be integrated into the LXC container as NFS or CIFS mounts in order to access external data.
- Proxmox LXC NFS Share Mount
- Proxmox LXC CIFS Share Mount
Caution!
Privileged containers run under the root user of the host system. This means that the root user within the container also has root rights on the host.
Due to the fact that root rights of the container can be extended to the host system, privileged containers pose a higher security risk. A security problem in the container could potentially jeopardize the entire host system.
Proxmox: Mount NFS share in LXC container
NFS or Network File System is a widely used protocol for file transfer on Unix (Linux) systems. NFS shares can be mounted in a privileged Proxmox container with the activated NFS feature.
APT: Install NFS-Common
If the requirements are met, we can install the necessary tools and mount the NFS share. For all common Linux distributions such as: Debian, Ubuntu etc. we need the package NFS Common:
First we update the package sources and the installed packages themselves:
sudo apt-get update && apt-get upgrade -yFor Debian based distributions or all with APT Package Manager:
sudo apt-get install nfs-commonWe confirm the query with Yes (Y)
NFS Share Mount
You can then mount an NFS share in the Proxmox LXC container. You can use the mount command for this. Drives mounted using the command are only available until the next reboot. How to mount drives automatically using fstab is described below.
sudo mount -t nfs -o soft 192.168.1.2:/volume1/media /mnt/mediaThe mount command follows the following syntax:
mount [parameter] device mount-pointThe Mount command followed by the parameters (in this case the type: NFS) is followed by the IP or the host name of the server or the device that provides the NFS share. The local mount point is specified separated by a space. This is the local folder under which we will later find our data on the NFS share storage.
Before you can mount the NFS share you have to create this local folder, otherwise an error message will be returned.
Before we can mount our NFS share on the server 192.168.1.2/volume1/media, we must first create the local mount point (folder):
mkdir /mnt/mediaThen we can attach the mount:
sudo mount -t nfs -o soft 192.168.1.2:/volume1/media /mnt/mediaIf we now navigate to our mount point, we can already see the data and folders on the share, if available:
cd /mnt/media

ls -a
All files and folders are displayed with ls -a.
Now we want the NFS share to be mounted automatically at every start. To do this, we need to make an entry in the fstab file.
Mount NFS share automatically
The fstab file can be found under /etc/fstab and can be opened with an editor of your choice.
nano /etc/fstabThis is what it looks like:
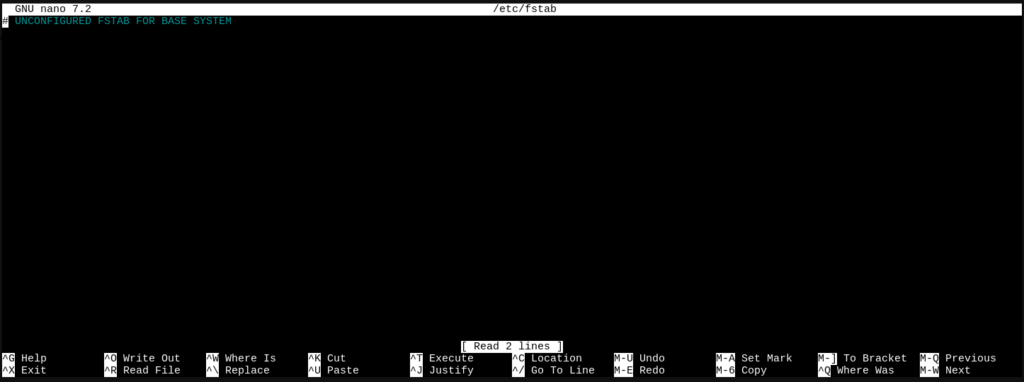
However, you cannot simply copy the previously created mount command into the fstab file; the syntax is slightly different here. Default stands for the options: rw,suid,dev,exec,auto,nouser,async.
192.168.1.2:/volume1/media /mnt/Medien nfs defaults 0 0Note:
Entries in the individual columns must not contain spaces, as these are interpreted as separators. Spaces in device names, labels or mount points must therefore be enclosed by the character string \040. The backslash is sufficient for other special characters.
Example:
192.168.1.2:/volume1/Cyber talk /mnt/Medien nfs defaults 0 0The space between Cyber and Talk must be replaced by \040. It will look like this:
192.168.1.2:/volume1/Cyber\040talk /mnt/Medien nfs defaults 0 0The syntax of the fstab entry for the nfs-mount looks like this:
[device] [mount-point] [filesystem-type] [options] [dump] [pass]Please note that only one entry per line is written to the fstab file. We now copy our entry into the fstab file under the comment marked with # and save the file with: CTRL + X -> Save Buffer -> Y -> Enter
192.168.1.2:/volume1/media /mnt/Medien nfs defaults 0 0Normally, the “defaults” options are sufficient. If additional options are required for certain applications, this can usually be found in the corresponding documentation.
Even if we have saved the file, the nfs share is not yet mounted. To execute the fstab manually, we need the two commands:
sudo systemctl daemon-reload
sudo mount -a
The NFS share is now mounted in the Proxmox LXC container and available.
Proxmox: Mount CIFS share in LXC container
To mount a CIFS share in a Proxmox LXC container, we also need a privileged container with the activated feature as described in the prerequisites.
Caution!
Privileged containers run under the root user of the host system. This means that the root user within the container also has root rights on the host.
Due to the fact that root rights of the container can be extended to the host system, privileged containers pose a higher security risk. A security problem in the container could potentially jeopardize the entire host system.
CIFS (Common Internet File System) is a network file system protocol that was developed to share files, printers and serial ports across a network. It was developed by Microsoft as an extension of the original SMB (Server Message Block) protocol. CIFS allows users to read and write files on remote servers as if they were on the local computer.
CIFS is often used in heterogeneous networks where Windows and Unix/Linux systems need to work together.
APT: Install CIFS Utils
To mount a CIFS share in an LXC container, we also have to install the corresponding package.
First we update the package sources and the installed packages themselves:
sudo apt-get update && apt-get upgrade -yThen we install the cifs-utils:
sudo apt-get install cifs-utilsWe confirm the query with Yes (Y)
CIFS Share Mount
You can then mount a CIFS share in the Proxmox LXC container. You can use the mount command for this. Drives mounted using the command are only available until the next reboot. How to mount drives automatically using fstab is described below.
Like the NFS share, the CIFS share can also be mounted using the mount command:
sudo mount -t cifs //192.168.1.3/volume1/media /mnt/media -o username=Tobias,password=secretOne difference to NFS is immediately apparent: Access data in the form of a user name and password are required. These are the data used to log on to the server.
This is the syntax for the mount cifs command:
sudo mount -t cifs //servername/sharename /mnt/mountpoint -o username=yourusername,password=yourpassword,domain=example,uid=1000,gid=1000
The domain uid and gid option are only required in certain cases.
Before we can mount our CIFS share on the server 192.168.1.2/volume1/media, we must first create the local mount point (folder):
mkdir /mnt/mediaThen we can mount our CIFS share:
sudo mount -t cifs //192.168.1.3/volume1/media /mnt/media -o username=Tobias,password=secretIf we now navigate to our mount point, we can already see the data and folders on the share, if available:
cd /mnt/media

ls -a
All files and folders are displayed with ls -a.
Automatically mount CIFS share
The following also applies to the CIFS mount: With the command, the share is only mounted until the next reboot of the device. So if we want the CIFS share to always be mounted automatically, we have to make an entry in the fstab file.
The fstab file can be found under /etc/fstab and can be opened with an editor of your choice.
nano /etc/fstabThis is what it looks like:
However, you cannot simply copy the previously created mount command into the fstab file; the syntax is slightly different here:
//device/sharename /mnt/mountpoint cifs credentials=/home/Tobias/.smbcredentials,uid=1000,gid=1000,vers=3.0 0 0Our customized entry looks like this:
//192.168.1.2/volume1/media /mnt/media cifs credentials=/home/Tobias/.smbcredentials,vers=3.0 0 0Here the credentials are stored in a separate file. This is done to protect the access data from unauthorized access.
We create a file for this purpose. This can be located in the home directory, for example:
nano .smbcredentialsThe dot in front of the file name ensures that the file is hidden. We write the following entries in this file:
username=username
password=secret
domain=workgroup
Please note that only one entry per line is written to the fstab file. We now copy our entry into the fstab file under the comment marked with # and save the file with: CTRL + X -> Save Buffer -> Y -> Enter
Then the rights must be set so that only we ourselves can view this file. To do this, we execute the following command:
chmod 600 ~/.smbcredentialsEven if we have saved the file, the CIFS share is not yet mounted. To execute the fstab manually, we need the two commands:
sudo systemctl daemon-reload
sudo mount -a
Now the CIFS share is mounted in the Proxmox LXC container and available.